
How to Make Perfect Edges for Your Garden Beds and Borders
As a seasoned gardener or homeowner who is the proud owner of perennial beds, foundation beds, or any just a traditional border, chances are that you are familiar with the task of edging. No doubt, it will require creative thinking to define the difference between on landscape section and another, like your garden and lawn. Having beautiful edges provide clear boundaries and neatness for all to admire.
Must Read: How to grow a Green Garden?
Consider some of these garden edging tips to ensure you sport the perfect edges for your garden beds and borders.
Steps Involved to Create Your Garden Border or Edges
When you attempt to set a straight-line edge from one point to another, the best way to make it happen is to use a string from point A to point B. Mark this line using spray paint so you may stay on course when doing the edging.
What if you want a curved edge?

It is suggested you get yourself a buddy to help you place and shape the hose you’ll be using to define the edging. This way, you get a broad view of what it will look like when you finished edging.
You can use a malleable hose (One that has been left in the sun). Take one step at a time and create a stencil-like outline along your grass bed by dotting spray paint marks all along your hose. Take a step back and check to see if it flows.
What is the purpose of edging?
Edging your borders and garden beds is meant to keep turfgrass at bay. You get three grass growth types for which you’ll require the best grass seed, these are as follows:
- Bunch growing such as fescues and ryegrass. This type of grass forms clumps.
- Stoloniferous types such as St Augustine grass seeds. These spread over the soil, then root down before they shoot up.
- Rhizomatous grass type, like Bahia and Kentucky BlueGrass. They run underground, then send roots down before they shoot up.
Suggested: 5 Tips for Low-Cost Gardening
Tried and Tested Method for Creating the Perfect Edge
It is a case of using the right tool to take care of the garden edging job. Doing this will make your job a lot easier and the results will look fantastic.
One of the first methods that come to mind with edging your borders is the use of a half-moon edger or spade. However, it is not the best way to cut curves, and it is challenging to evaluate the direction you are going with the spade as you move along.
The problem is that edging is not a straightforward task, but should be viewed as a journey. It is not as much about your destination as it is about the desired outcome. In other words, you need to plan by mapping out the beginning and end of the route you wish to take.
There are numerous edging machines one can use instead of just settling for the manual way of getting your edging done.
Weedeater or Powered Edge Hog
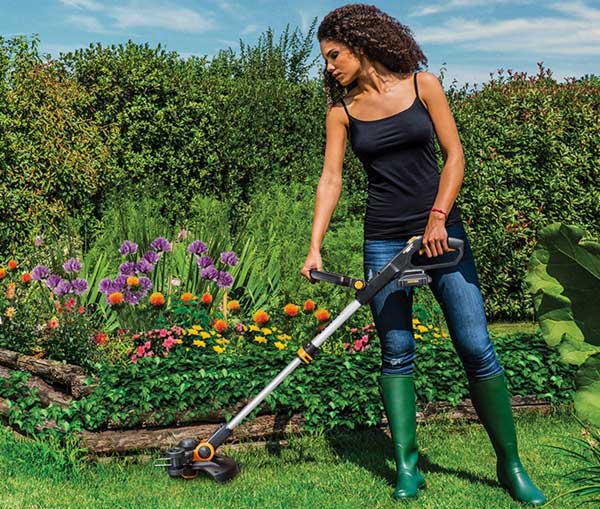
Some gardeners prefer using a Powered Edge Hog that is equipped with a circular blade on wheels. This tool would cut an 11-inch deep line into your soil. It sure is a handy tool if you have 5,000 feet (1.52 km) of edging to do.
For smaller gardens, you would do just fine with one of the best weed eaters made available from various sources online.
Using Hand Shears to Edge
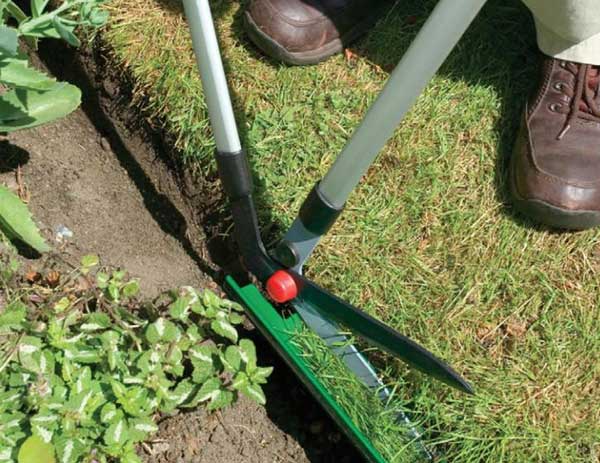
You could always use good quality hand shears to do the job. Especially, if you are someone who wants your garden edges to be razor shape, All you need to do is place your shear vertically alongside your trench wall, then cut off any grass blades that hang over the edges or hire someone to do it.
Take care not to hold your garden shears horizontally as you might destroy the right angle of your edge.
Other Edging Methods Used with Great Success
You may have trouble making up your mind between different edging methods. There is a huge variety of edging ideas you can use these days.
Have you considered brick paving?
Not only does it create a handsome garden border, but it works well for lawn edging too. It is the perfect method if you wish to have a wide border that will also keep the grass out of your garden bed. What’s more, you will prevent your plants and flowers from spilling over onto the grass. On the other hand, your mower won’t accidentally chop them up.
What about metal lawn edging?
You may want to think about using 4-inch deep strips of plastic, aluminum, or steel to separate your garden from your lawn. The metal lawn edging bend effortlessly into graceful and smooth edges to stop the grassroots from spreading. Another useful feature of doing your edging this way is that these miraculously disappear against your garden bed and grass bed. Then again, it is also easy to install as a paving border.
Making use of a raised-bed border
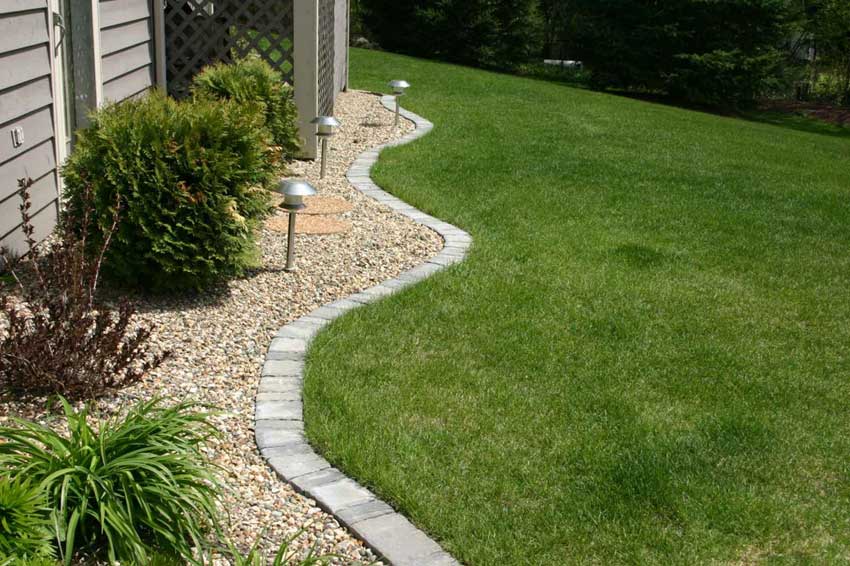
Laying down a stone wall is one of the best ways to set up a clean border along the edges of your lawn. You get to add depth and texture to a featureless yard, and it makes sense.
When you choose this method, be sure to explore a range of materials, shapes, and sizes, so you may create the perfect edge along your landscape. This is a brilliant solution for soggy gardens that are low-lying.
Furthermore, you can reduce your maintenance efforts by adding a 4-inch trench that is lined with plastic edging and covered with mulch. You will prevent grassroots from growing into the stone. The mulch offers a neat little mowing track for the wheels of your mower. The best part! You do not need to trim your grass.
Edging is important and not something to be overlooked. Not only does it add beauty and clarity to your landscaping, but it also defines your garden space. After all, we need clear edges and boundaries, so we may see where certain sections of our garden start and end.
Tags perfect edge garden

- Previous How to choose Flooring for Bathroom Renovation?
- Next 11 Modern Landscaping Ideas to Complement the Contemporary Home
You may also like...


0 thoughts on “How to Make Perfect Edges for Your Garden Beds and Borders”